Share

March 19, 2018

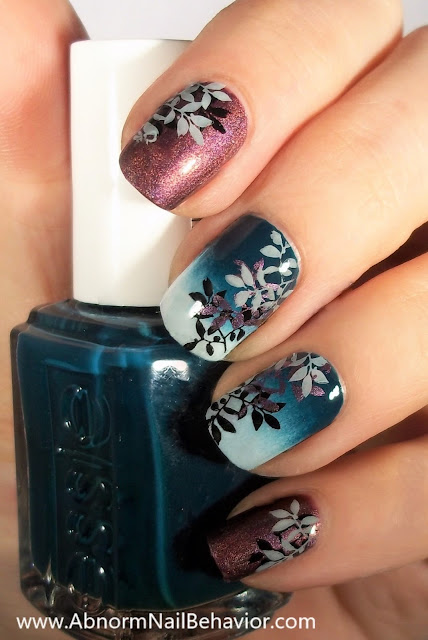
Teal Fantasy French Tips

Whimsical. Playful. Beautiful.nail stamping black gold teal
This is one of my favorite manicures to date.  I wore this one as long as I could.  I'm defiantly going to be trying this look in other colors.
nail stamping black gold teal nail polish
Supply List
Stamping Plate (Bundle Monster BM-607)
Black Stamping Polish (Konad Black Pearl)
Two Cream Polishes (Re-Teal Therapy/Jade Jump)
Clean up Brush
Top Coat (Seche Vite)

Green french tip simple nail art
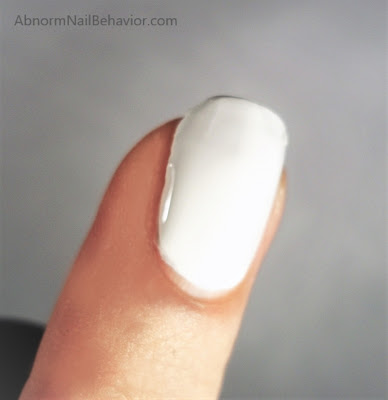
Step one: Start with your base of color. I really love this dark teal color, but take a look at the picture at the bottom of this post, before you run out and buy it. Use your favorite dark teal on your accent nails. Do a classic french tip in a lighter teal. (If you need a little help see: Perfect French tips: Sticker/ Band Aid Hack)
green ombre nail art
Step Two: Once your nails are dry, paint the cream polishes on a makeup sponge, and dab it on your accent nails. Repeat this step until you have the ombre you want. Let it dry each time. I did it twice for this manicure.
simple ombre nail art sponge gradient
Now its time to stamp on our design.

Black and gold stamping polish
I layered two colors but it is also quit pretty with just the gold.
gold accent nail
Step Three: Stamp on your design with the metallic polish. Orly Luxe is not specifically made for stamping but it works like a charm. I find many metallic polishes can be used for stamping.
Nailspiration gold and black accent nail
Step Four: Stamp over the gold in a black polish. Try not to place in exactly over the first stamp so that the gold peeks out like a shadow.

Top coat (Seche Vite is my favorite) and done.

It's not my style to say bad things about products. 
"If you can't say something nice, don't say nuthin' at all" -Bambi's Thumper. 

A picture is worth a thousand words. Here's a picture of my nails after I removed Salley Hansen's Re-Teal Therapy. 
Nail polish stained nails
Tip: If your nails are stained by a polish you can lightly buff it out with a file. Try not to do this too often or you will end up with thin weak nails. I recommend a base coat and not using polishes that stain your nails.


March 18, 2018

How To Repair A Splitting Nail: Super Glue Hack

When my nails are long, they sometimes get these little horizontal splits. I find myself snagging them on everything: when I wash my hair, get dressed, remove nail polish with a cotton round. You get the picture. 

fix a cracked nail hack

Eventually, the nail breaks and I'm left with one short nail. So I  have to file down all the rest. I use the following tip often . It really saves the length of your nails, and it's so easy. 


fix a cracked nail hack

Supply List
Supper Glue or Nail Glue

hack to stop a nail from breaking

Step one: Apply a tiny amount of glue over the top of the split and all along the side of your nail. Be careful not to get it on your skin. Gently lift up on the split, then push it back down to allow some of the glue to get in the crack. Work quickly and carefully. You only have about 10 seconds before the glue sets. After a few repairs, you'll get really good at fixing splits.

Step two: Allow the glue to dry for a few minutes.

Step Three: Use your nail file to gently smooth the surface of the glue and take off any ridges. File along the side edge of your nail to make sure you don't have anything that can snag.

Step Four: Paint your nails as usual and continue to enjoy your length.

Once you have one of these splits, you"ll need to keep an eye on it. The glue eventually gives a little and starts splitting again. Whenever you notice it showing up, or you snag it again, repeat the process. The glue usually holds it in place for a few days. I do this a couple times until the nail grows out. It doesn't take much time, and its worth not having to file off all of your nails, or have one really short one.

hack to stop a nail from breaking

March 13, 2018

French Tips: Sticker/Band Aid Hack


It's such a struggle to do a perfect french tip manicure at home. I can freehand my left hand just fine, but my right nails are always an uneven mess. This is my favorite hack for getting that perfect clean line. The best part about this method is, you can buy these Self-Adhesive Paper Reinforcements just about everywhere, for practically nothing. Any rounded sticker will work for this. I sometimes use the edge of a small band-aid. In a pinch, I've used the stickers that come on fruit. :)

Things you can use as french tip guides

Supply list
Your Favorite Polish (Pictured: Sally Hansen Jade Jump)
Self-Adhesive Paper Reinforcements, Band Aids, or any Round Sticker
Nail Clean Up Brush or old Angled Makeup Brush
Acetone or Nail Polish Remover
Top Coat (I use Seche Vite)

Step One: Apply stickers to a clean nails. Make sure the adhesive is pressed down onto your nails. I rub the top with my thumb. Check the edge for wrinkles or lifting. I place all the stickers before I move on to step two. You don't want to smudge your polish fumbling with the stickers.

March 7, 2018

Blending Stamp Colors : Hibiscus Nail Art

I finally convinced my best friend to let me put my craziness on her nails! I am so used to painting my own nails, it was actually very hard to paint someone else's - LOL! She escaped my clutches before I could get a picture of her Mani. You know how it is with girls, if she has something pretty, I want it also. So, I did a dup of my work to share with all of you. 

flower nail art tutorial nail stamping
Hibiscus nail art tutorial
 I used a technique I have come to love, where you blend polish colors directly on the stamping plate. So simple to do! 

March 5, 2018

Reverse Stamping: How to Make a Nail Decal


 So what the heck is reverse stamping? Glad you asked, because it is my new favorite thing!  It begs the question: "How did you do that?". Let me show you! 

Reverse stamping is layering polish to color in stamps, and then turning them into colorful decals. It is a little more on the advanced side, but practice always make perfect. I promise, it's not as hard as it looks.

Born Pretty nail stamping plate BP-X38

I picked this daisy and lady bug plate because I wanted to demonstrate a multicolored design, and it has a ton of great detail. 


reverse nail stamping decal comparison

Above is the difference between just plain stamping and reverse stamping. The nails on the left are the same design as the nails on the right, but the difference is amazing.

Popular